Integration Guides/ Manuals
-
- Identity Provider (IdP): The Foundation of Sastrify Insights
- Uncover SaaS Usage and Shadow IT with Identity Provider (IdP) Discovery
- Integrating HRIS to Enrich Identities & Insights
- Admin Guide: Deploying the Sastrify Chrome Extension
- Admin Guide: Deploying the Sastrify Microsoft Edge Extension
- Manual Installation Guide: Sastrify Chrome Browser Extension
- Manual Installation Guide: Sastrify Edge Browser Extension
- Setting renewal dates & reminders
- Assigning & Modifying Subscription Owners
- Uploading & Managing Your SaaS Documents in Sastrify
- Sastrify App Support: Get Help & Give Feedback
- Sastrify's commitment to security and privacy standards
-
- Capturing Subscription Details with Contract AI
- Adding a New Subscription Manually
- Slack Integration: Bringing Sastrify into Your Internal Communication
- How to bulk upload your invoices
- Automating Document Uploads via Email Forwarding
- Managing Your Notification Preferences
- Tools and Spend Importer: Bulk Upload & Visualization
- Tool Matching: Aligning ERP Data with Your Inventory
- Managing Collaboration with Custom Tasks
- Task Automation: Standardizing and Automating Routine Actions
-
- Workflows: Automate procurement processes with consistency
- Requests: Streamline procurement process and internal approval
- Get Procurement Support for New Purchases and Renewals
- How to submit and track Procurement Requests via Jira Integration
- Scope of service: Custom benchmarking & contract review
- Scope of service: Negotiation & renewal support
- Scope of service: Custom SaaS Optimization Advisory
- Purchase your SaaS through the SastriMarket
-
- Connecting Your ERP & Accounting Software
- Spend Import: Validate and fine-tune your imported spend data
- Export spend data from Candis to Sastrify
- Export spend data from Spendesk to Sastrify
- Export spend data from Pleo to Sastrify
- Export spend data from Moss to Sastrify
- Export spend data from DATEV to Sastrify
- Export spend data from Ramp to Sastrify
-
- Configuring Authentication & Access
- User Management: Managing Users and Platform Roles
- Configuring Microsoft SSO Authentication
- Configuring Okta SSO Authentication
- Configuring JumpCloud SSO Authentication
- Configuring Cisco Duo SSO Authentication
- Configuring Cloudflare SSO Authentication
- Configuring OneLogin SSO Authentication
- Having trouble logging in?
- Understanding user roles and permissions
-
- Okta Identity Provider (IdP) Integration Guide
- Accounting & ERP: Connecting NetSuite to Sastrify
- Accounting & ERP: How to connect Quickbooks
- Accounting & ERP: How to connect Microsoft Dynamics 365
- Accounting & ERP: How to connect Workday ERP
- Accounting & ERP: How to integrate Pleo with Sastrify
- HRIS: Connecting Officient to Sastrify
-
- ERP & Accounting Integration FAQs
- SSO / IDP Discovery Integration FAQs
- Browser Extension FAQs
- HRIS Integration FAQs
- Usage Analytics FAQs
- Contract AI & Subscription Details FAQs
- Tools and Spend Importer FAQs
- Invoices FAQs
- Achieved Savings FAQs
- Form component guide for Sastrify form builder
- What is SaaS and Sastrify's scope of work?
- Who receives the renewal alerts or reminders?
- How does Sastrify work with currencies?
- Is the spend data from accounting export always up-to-date?
- How to work with benchmark prices
- When and how to involve Sastrify in a contract evaluation or negotiation?
- How does Sastrify interact with SaaS vendors?
- How do you handle confidentiality clauses in vendor contracts?
- Why is contract data essential for benchmarking and negotiation support?
Okta Identity Provider (IdP) Integration Guide Print
Modified on: Mon, 9 Mar, 2026 at 3:00 PM
IN THIS ARTICLE
- Step 1: Open the Okta integration setup page in Sastrify
- Step 2: Create the Okta app in the Okta admin console
- Step 3: Assign API scopes to the app
- Step 4: Assign the application to users or groups
- Step 5: Check API rate limits
- Step 6: Ensure your refresh Token Access Policy is adequate
- Step 7: Connect the Okta app to Sastrify
Step 1: Open the Okta integration setup page in Sastrify
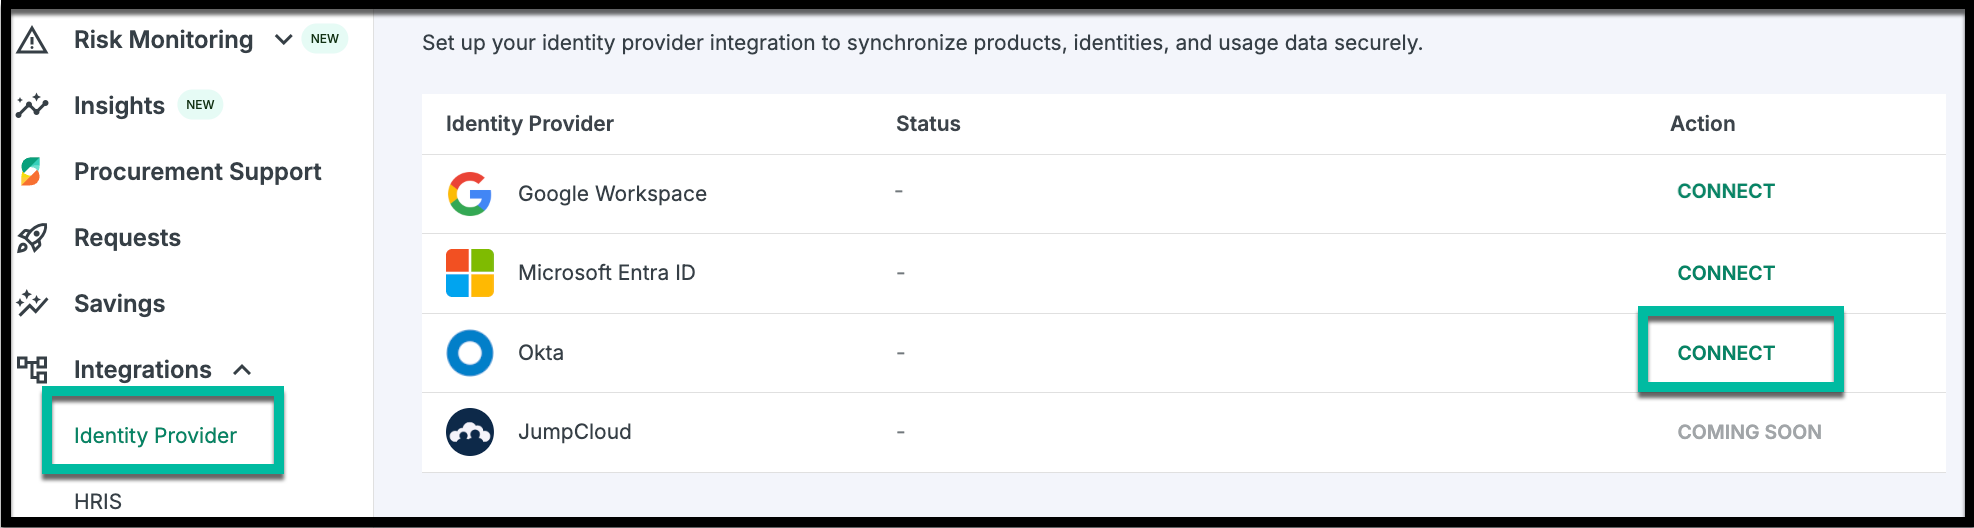
- Log in to your Sastrify platform.
- Select Okta, and click Connect.
- A setup page will open, displaying the required configuration details and input form.
Step 2: Create the Okta app in the Okta admin console
Log in to your company’s Okta Admin Console using an administrator account.
Go to Applications and click Create App Integration.
Choose OIDC - OpenID Connect—as the sign-in method.
Select Web Application as the application type and click Next.

Name the app (e.g., Sastrify Okta Integration).
Under Grant Types, select both Authorization Code and Refresh Token.

In the Sign-in Redirect URI field, enter the following callback URls:
Click Save and Continue.
Step 3: Assign API scopes to the app

- Navigate to Security > API > Authorization Servers.
- Select your default authorization server.
- Go to the Okta API Scopes tab.
- Ensure that you have enabled the following scopes by clicking the Grant button next to each one.
- okta.users.read
- okta.logs.read
- okta.apps.read
In addition to the above, the following scope will automatically be assigned to you in the app by default.
- openid
- profile
- offline_access
Step 4: Assign the application to users or groups

Open the app you just created.
Go to the Assignments tab.
Assign the app to at least one user or group.
Note: This step is required for the integration to function properly.Step 5: Check API rate limits

Ensure the app’s API rate limits are sufficient:
Okta returns up to 200 users per call.
Sastrify may send up to 50 requests per minute per API during syncs.
Plan for at least:
<Your number of employees> ÷ 200requests per minute.Adjust the limits as needed to avoid throttling.
Step 6: Ensure your refresh Token Access Policy is adequate
- By default, Okta requires reauthorization every 90 days to prevent indefinite access to your resources.
- If you're fine with this default and haven't defined custom access policies, you can skip this step.
- To change the reauthorization period, configure a custom access policy:
Okta Console > Security > API > click on the Default Authorization Server > Access Policies > Add New Access Policy - Follow the steps in the screenshots below to configure the policy.
- Sastrify will prompt you to reconnect and reauthorize data access based on the configured refresh token lifespan.

Step 7: Connect the Okta app to Sastrify

Return to the Okta setup form in your Sastrify platform.
Enter your Okta subdomain (e.g.,
yourcompany.okta.com).Input the Client ID and Client Secret from the Okta app.
Click Connect.
You will be redirected to Okta to log in and authorize access.
After logging in, you'll be redirected back to Sastrify.
Did you find it helpful? Yes No
Send feedback